
Part Three - Astrophotography with a Classic Cave
1971 10 " F/6 Custom Super Deluxe
by Jon Miles
Click on any image for larger size
Astrophotography with a Classic Cave telescope can be quite rewarding. It is not as easy as using a modern scope with Goto and more precise tracking mounts. But solar, lunar and planetary imaging with a Cave can produce some very nice images.
As with all visual and AP situations seeing is king and good results are always dependent on a steady atmosphere.
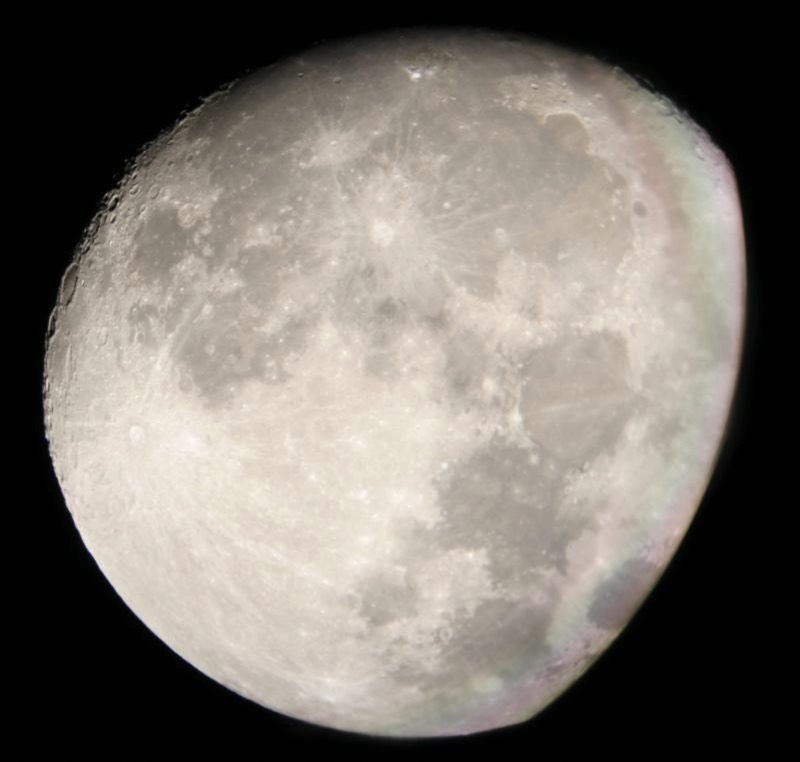
Soon after I brought my Cave home I had it out and trained on the Moon. With a 26.6mm Orthostar ocular the views were breathtaking. So I grabbed my trusty Canon Xti DSLR camera, just held it up to the eyepiece and shot away.
Not the best but there is still quite a lot of detail in this shot.
As with all visual and AP situations seeing is king and good results are always dependent on a steady atmosphere.
Soon after I brought my Cave home I had it out and trained on the Moon. With a 26.6mm Orthostar ocular the views were breathtaking. So I grabbed my trusty Canon Xti DSLR camera, just held it up to the eyepiece and shot away.
Not the best but there is still quite a lot of detail in this shot.
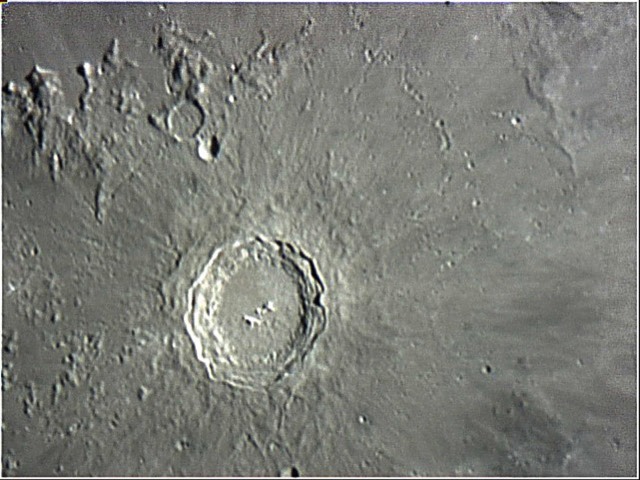
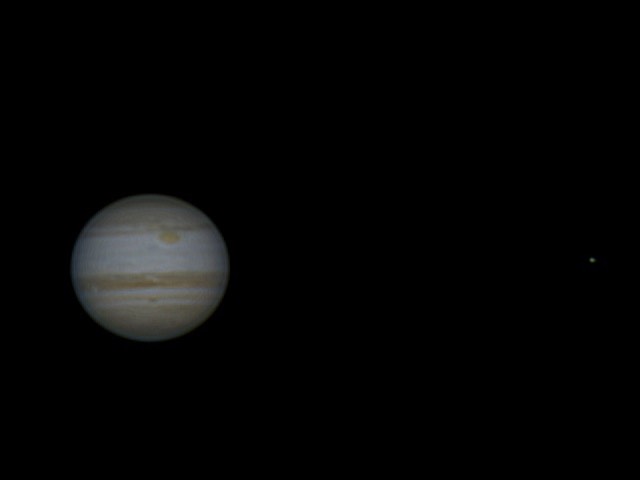
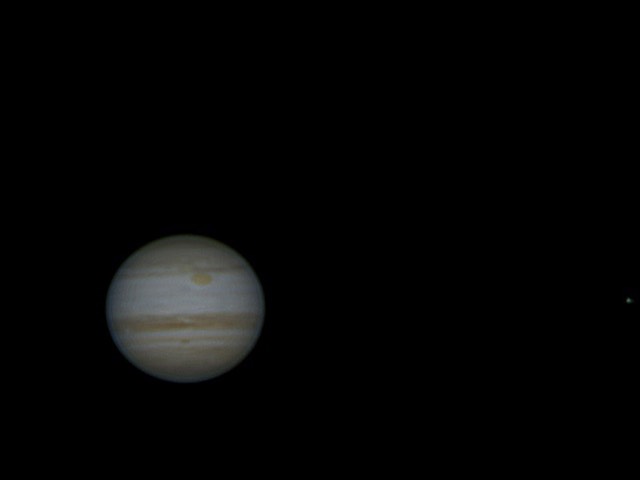
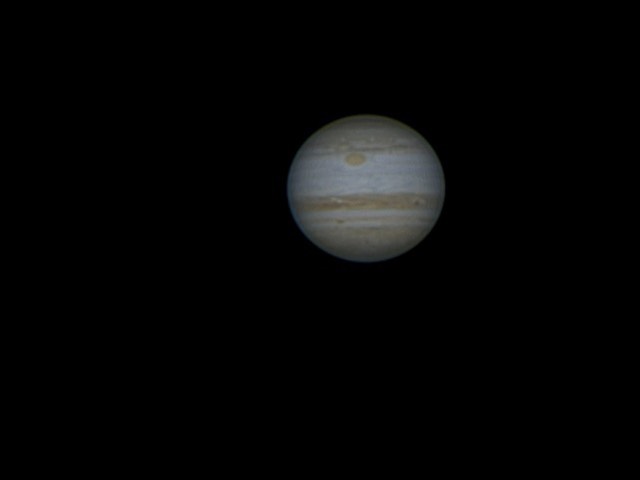
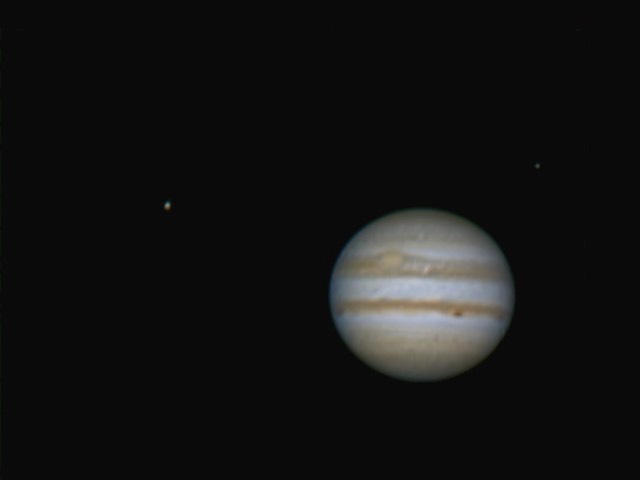
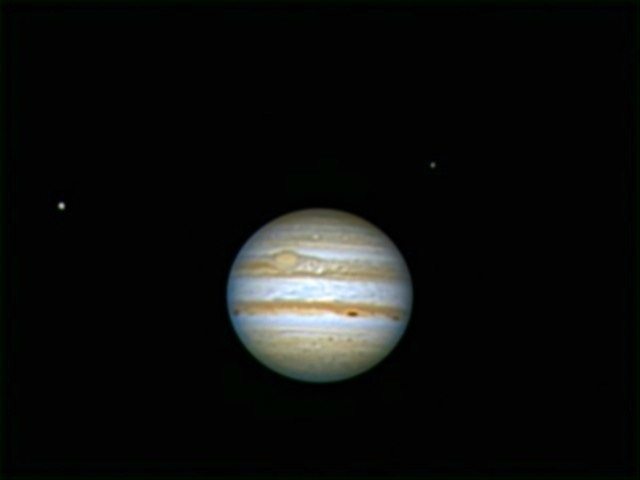
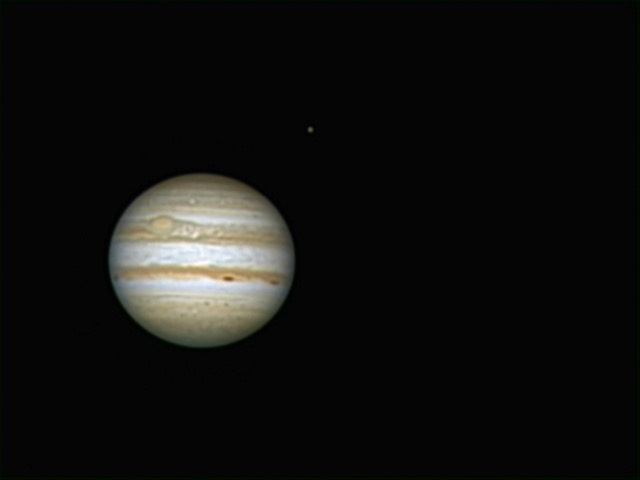
After the scope was restored it was time to get a bit more serious with the AP thing. Jupiter is a favorite visual object and is relatively easy to photograph. It is such a fascinating subject with the moons always in a different position and the cloud bands always doing something unique.
I started out with a humble Philips spc900nc webcam. You simply remove the lens and add a nosepiece adapter that is 1.25” outside diameter for a standard focuser. Adding a Baader IR/UV filter is recommended not only to cut these light bands out but to keep dust off of the camera’s CCD chip, which will now be exposed.
There are two basic methods for planetary AP, color and mono. With color you shoot a single color video and process it. Mono is much more complicated and requires shooting with a color filter wheel, taking separate videos of red, green and blue, then processing them and combining them into a final RGB color image. Starting out with a color camera is much easier and cheaper but mono will produce better images in conditions of good seeing.
Jupiter can only be shot for about 3 minutes as it rotates so fast that going any longer will result in a smeared stacked image. There are de-rotation programs but I have not progressed to the point of needed them.
There are numerous tutorials on the web to guide someone trying to learn the processes needed to produce good results. The Cloudy Nights Solar System Imaging forum is another great source.
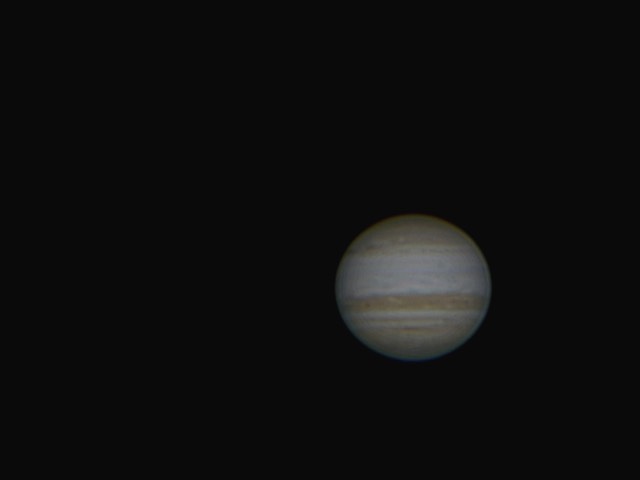
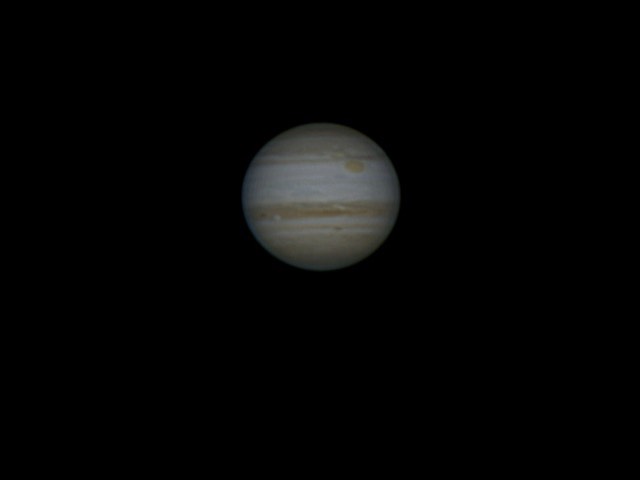
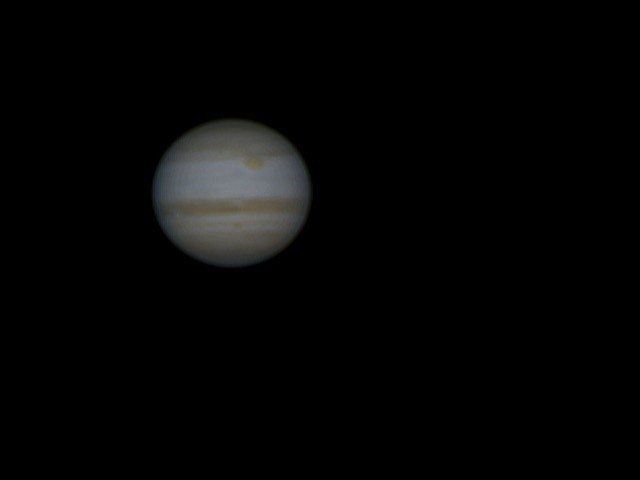
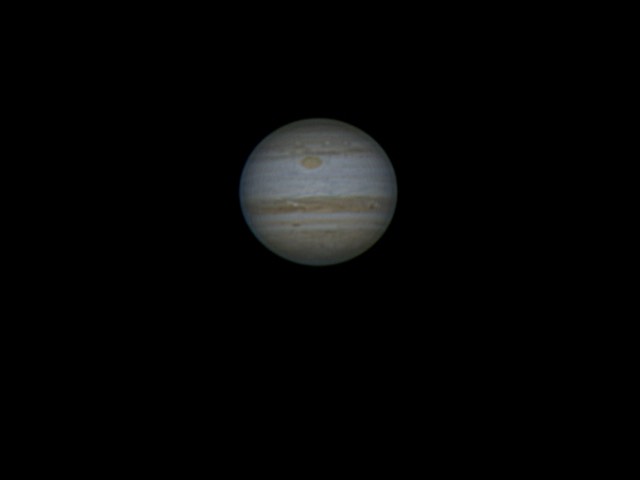
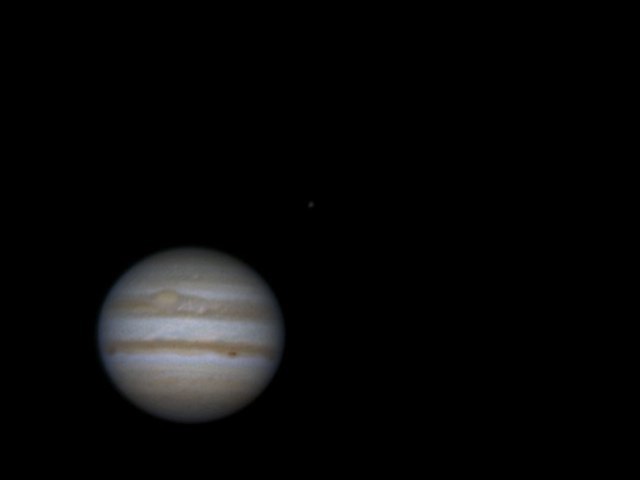
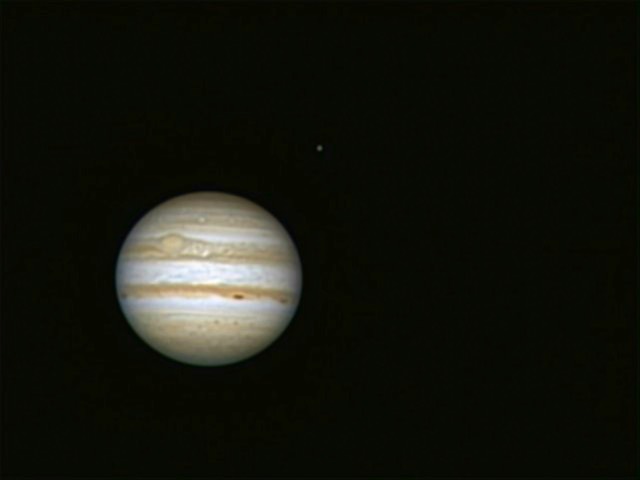
My first try at Jupiter was taken with a Philips spc900nc with Baader IR/UV filter, 2x Barlow, 3 minutes at 10 fps with k3ccdtools and processed with Registax 5. As you go through the images that follow you will see that the biggest improvements are with my processing techniques. It is a real learning curve.
Jupiter 9/5/2010, 3:53 UT
I started out with a humble Philips spc900nc webcam. You simply remove the lens and add a nosepiece adapter that is 1.25” outside diameter for a standard focuser. Adding a Baader IR/UV filter is recommended not only to cut these light bands out but to keep dust off of the camera’s CCD chip, which will now be exposed.
There are two basic methods for planetary AP, color and mono. With color you shoot a single color video and process it. Mono is much more complicated and requires shooting with a color filter wheel, taking separate videos of red, green and blue, then processing them and combining them into a final RGB color image. Starting out with a color camera is much easier and cheaper but mono will produce better images in conditions of good seeing.
Jupiter can only be shot for about 3 minutes as it rotates so fast that going any longer will result in a smeared stacked image. There are de-rotation programs but I have not progressed to the point of needed them.
There are numerous tutorials on the web to guide someone trying to learn the processes needed to produce good results. The Cloudy Nights Solar System Imaging forum is another great source.
My first try at Jupiter was taken with a Philips spc900nc with Baader IR/UV filter, 2x Barlow, 3 minutes at 10 fps with k3ccdtools and processed with Registax 5. As you go through the images that follow you will see that the biggest improvements are with my processing techniques. It is a real learning curve.
Jupiter 9/5/2010, 3:53 UT
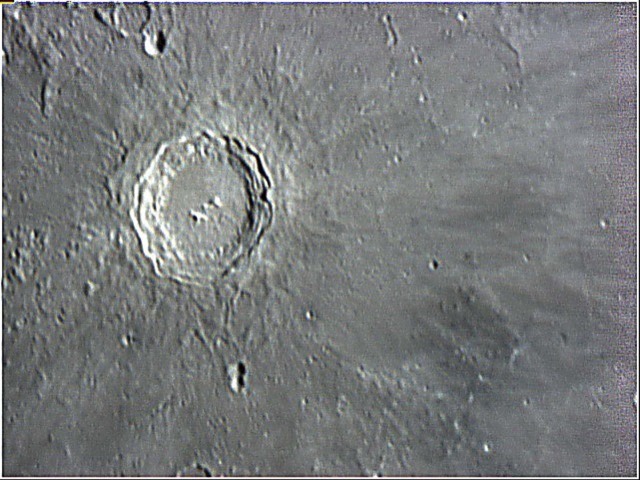
One thing that was holding me back from getting better images (other than good seeing) was precise focusing. It is very difficult to focus properly, especially on nights of less than excellent seeing.
One accessory that can really help is a Bahtinov mask. These go over the front of your scope and allow you to precisely focus on a point of light, producing a pattern that shows when you are spot on.
These can be bought commercially but I decided to make my own. I found a mask generator on the web here:
http://astrojargon.net/MaskGenerator.aspx?AspxAutoDetectCookieSupport=1
I printed out the pattern on a large format printer. Then I used an Exacto knife to trim out the slots in the pattern. Next I bought a large plastic No Parking sign at Lowes and taped the pattern to it. I used the Exacto to transfer the pattern to the plastic and then came the fun part – cutting the plastic with the Exacto knife – that took a while and my fingers were really sore after that. I used a tube end ring to trace the outside dimension. I then added some angle tabs, painted everything flat black, lined the tabs with fuzzy Velcro so they wouldn’t scratch the end ring and Viola! Focusing is much more precise now.
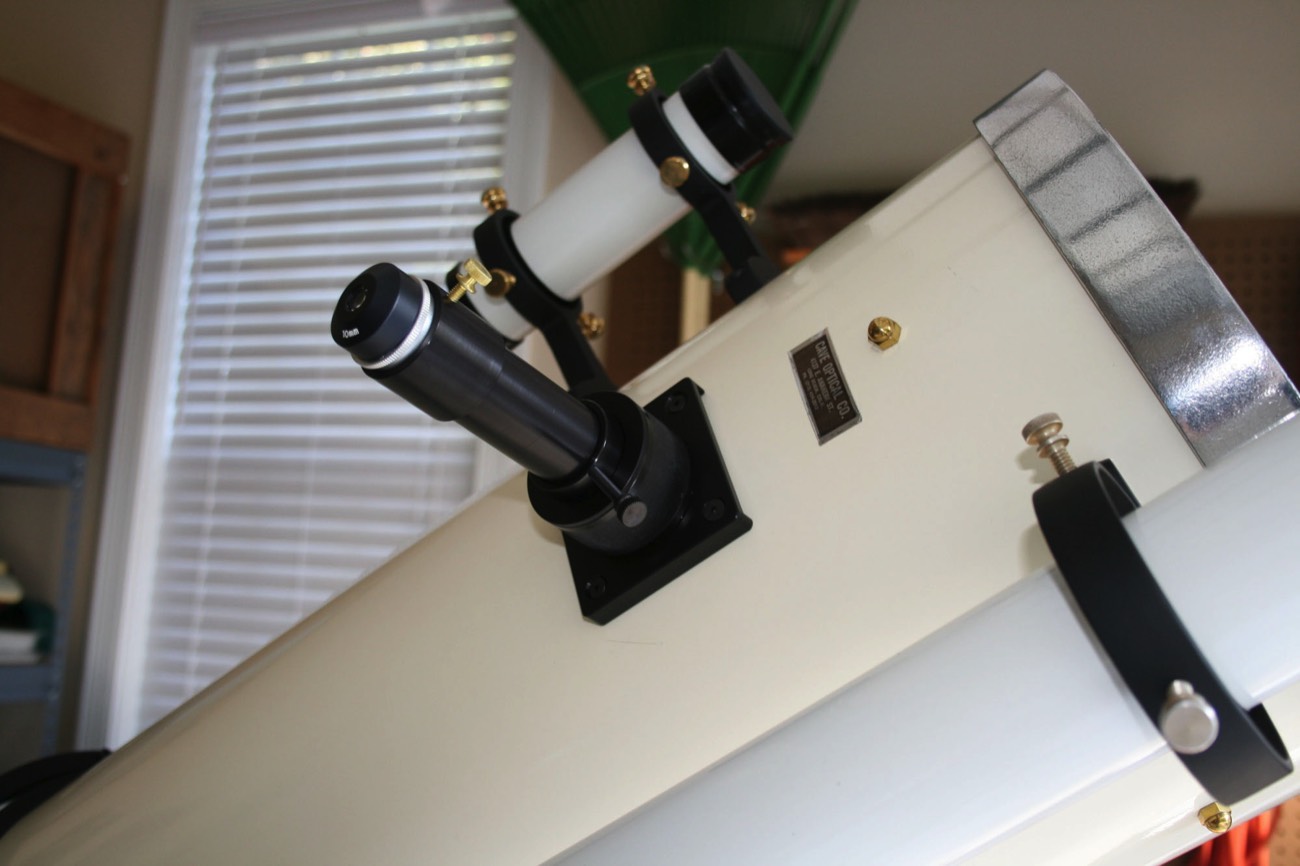
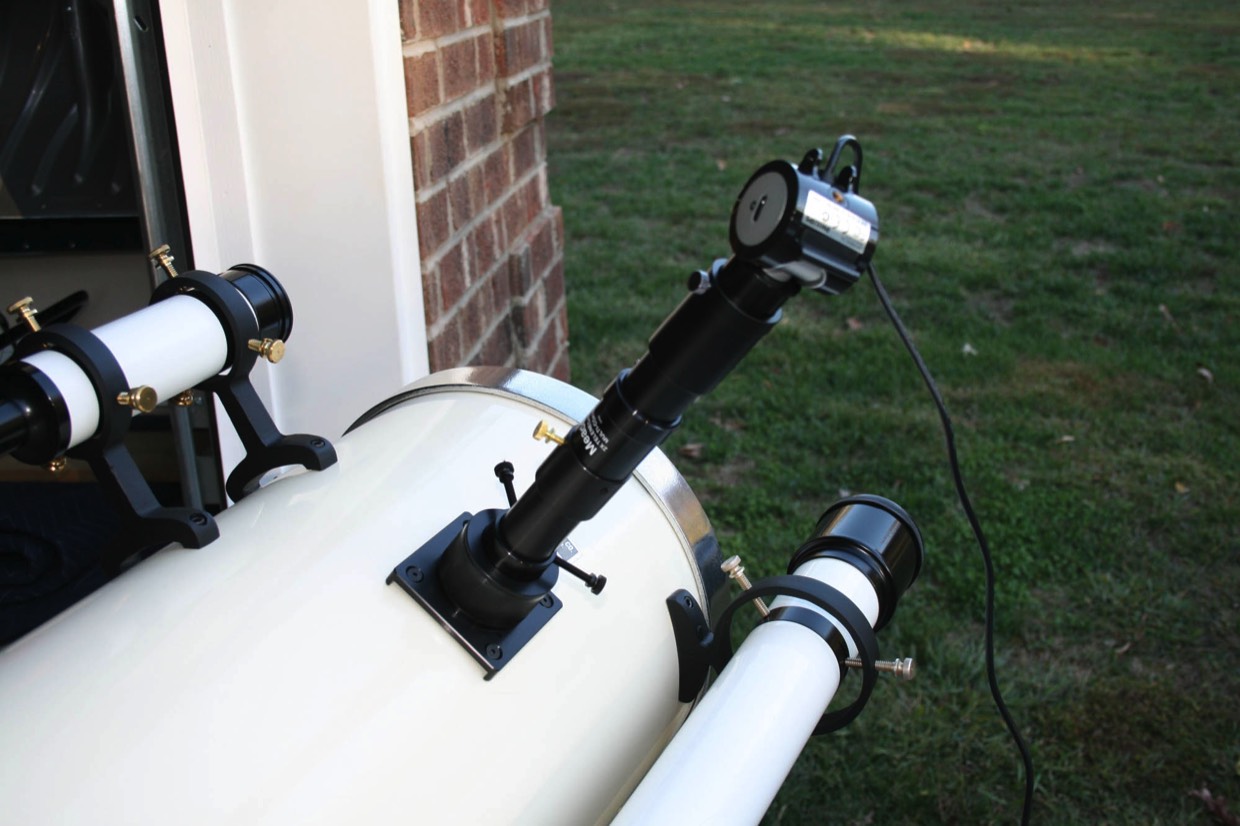
My other astro imaging problem was focus travel with the camera. The plane of the CCD chip is set farther away from the focuser than where an eyepiece would ride when in focus so I generally would not have enough inward focuser travel to focus the camera except when using a 2x barlow (producing an f/12 focal ratio).
So I went hunting for a new 1.25” focuser. I needed something short and it needed to be a direct bolt in replacement as I wasn’t going to modify the tube in any way. I found the perfect replacement in the Lumicon LF5005 low profile Helical focuser/filter slider combo. This had a bolt pattern (2.75” square) that almost matched the Cave perfectly. I say almost as the Cave is 1/16” smaller. But the mounting screws are flat heads so they allow for a slight amount of angle and it fit perfectly. It is only 1.875” minimum height compared to 5” for the original Cave focuser. The helical focusing mechanism is a joy to use, very precise, smooth and easy to use without jiggling the scope much when adjusting.
So I went hunting for a new 1.25” focuser. I needed something short and it needed to be a direct bolt in replacement as I wasn’t going to modify the tube in any way. I found the perfect replacement in the Lumicon LF5005 low profile Helical focuser/filter slider combo. This had a bolt pattern (2.75” square) that almost matched the Cave perfectly. I say almost as the Cave is 1/16” smaller. But the mounting screws are flat heads so they allow for a slight amount of angle and it fit perfectly. It is only 1.875” minimum height compared to 5” for the original Cave focuser. The helical focusing mechanism is a joy to use, very precise, smooth and easy to use without jiggling the scope much when adjusting.
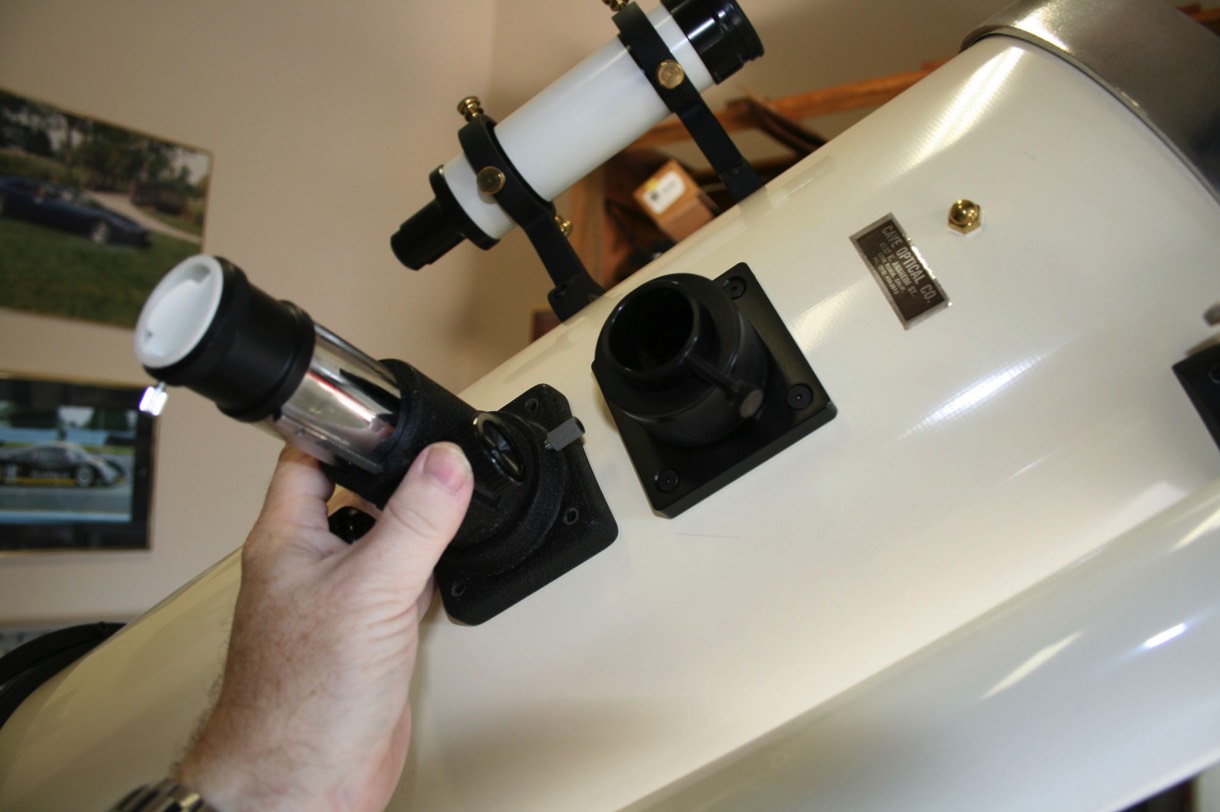

I also bought the Lumicon LA1020 3” extension tube for when I’m not using the filter slider (which is most of the time right now as I haven’t progressed to RGB imaging yet). This is nice as it is 1.25” OD all the way up to the top, only flairing out to 1.25” ID at the very end. This allows me to vary the height quite a bit depending on if I’m doing visual or camera work and then fine focus with the helical focuser.


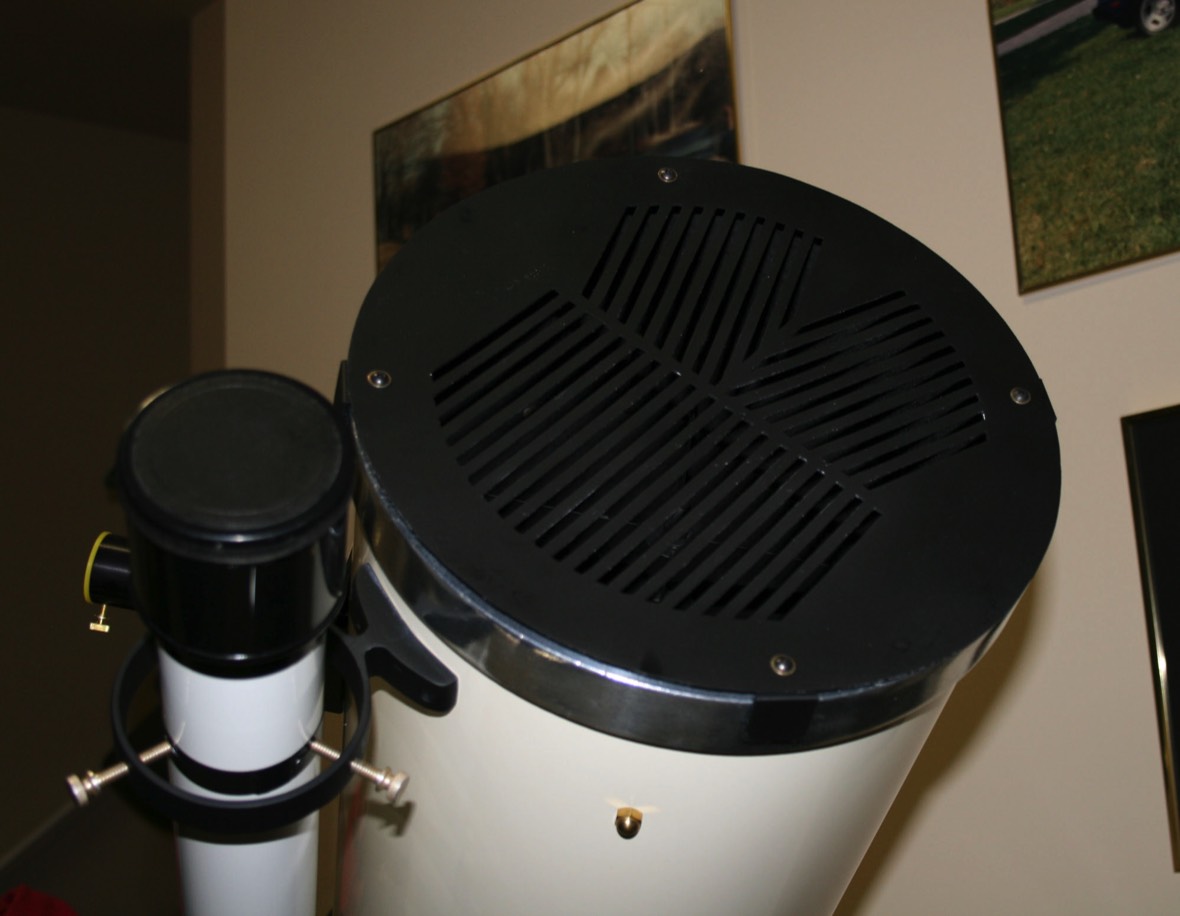
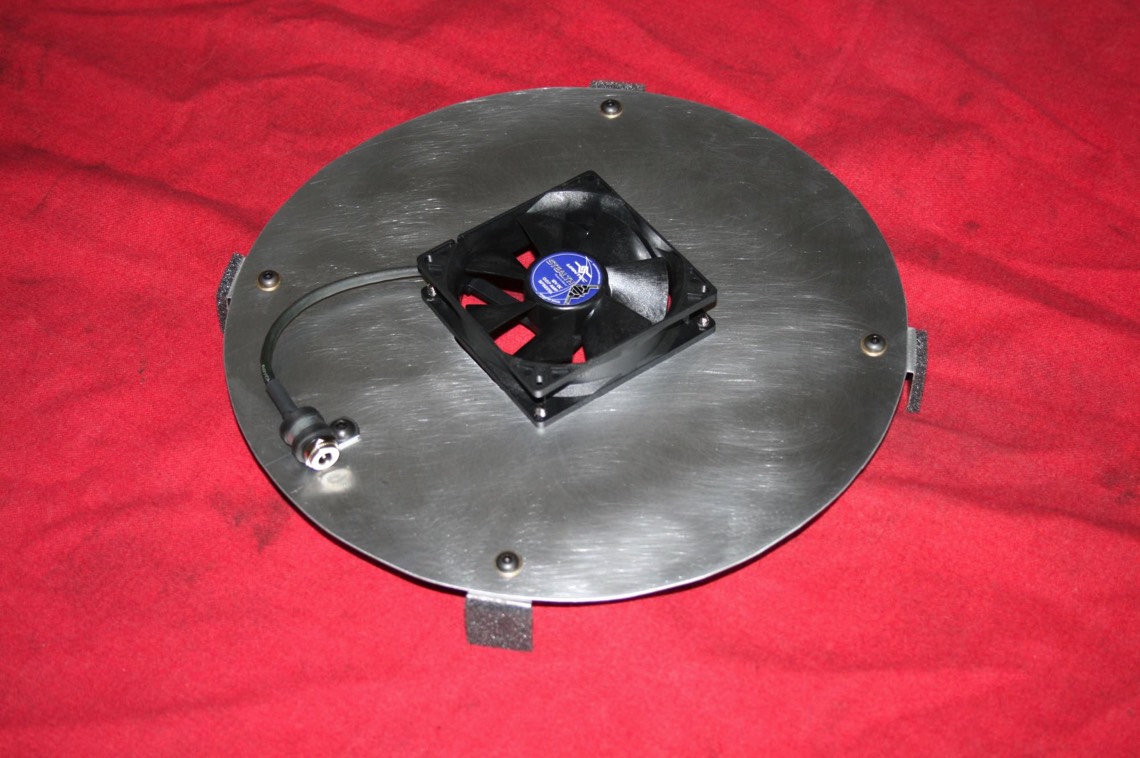
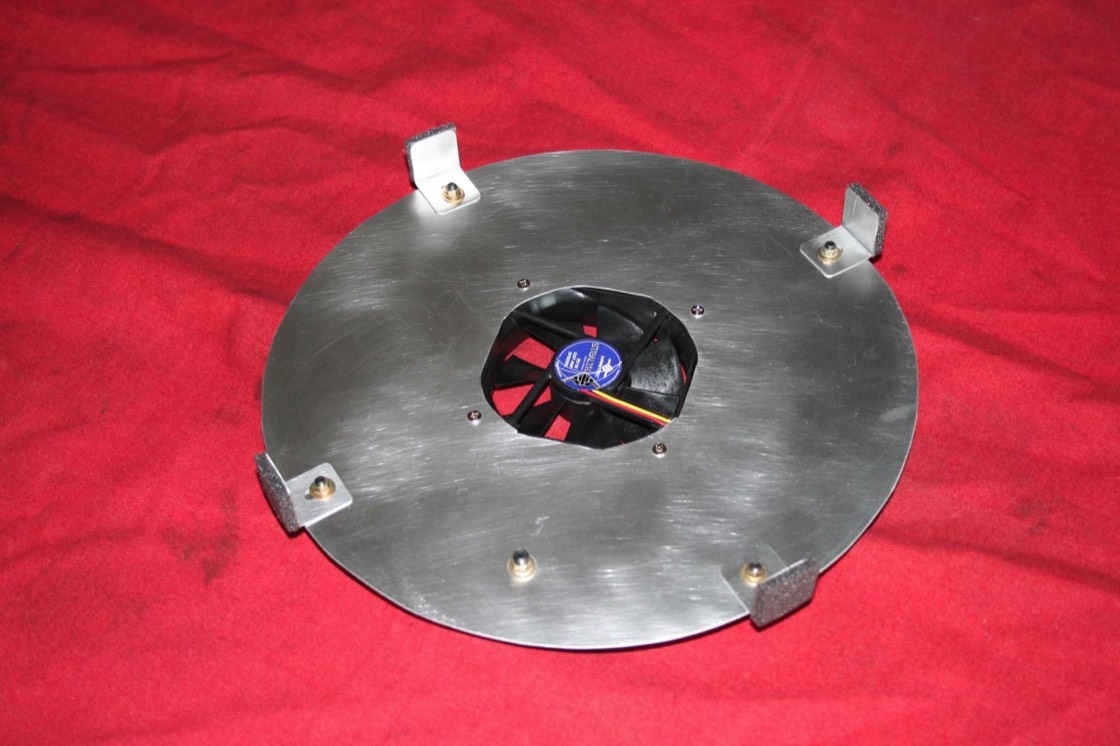
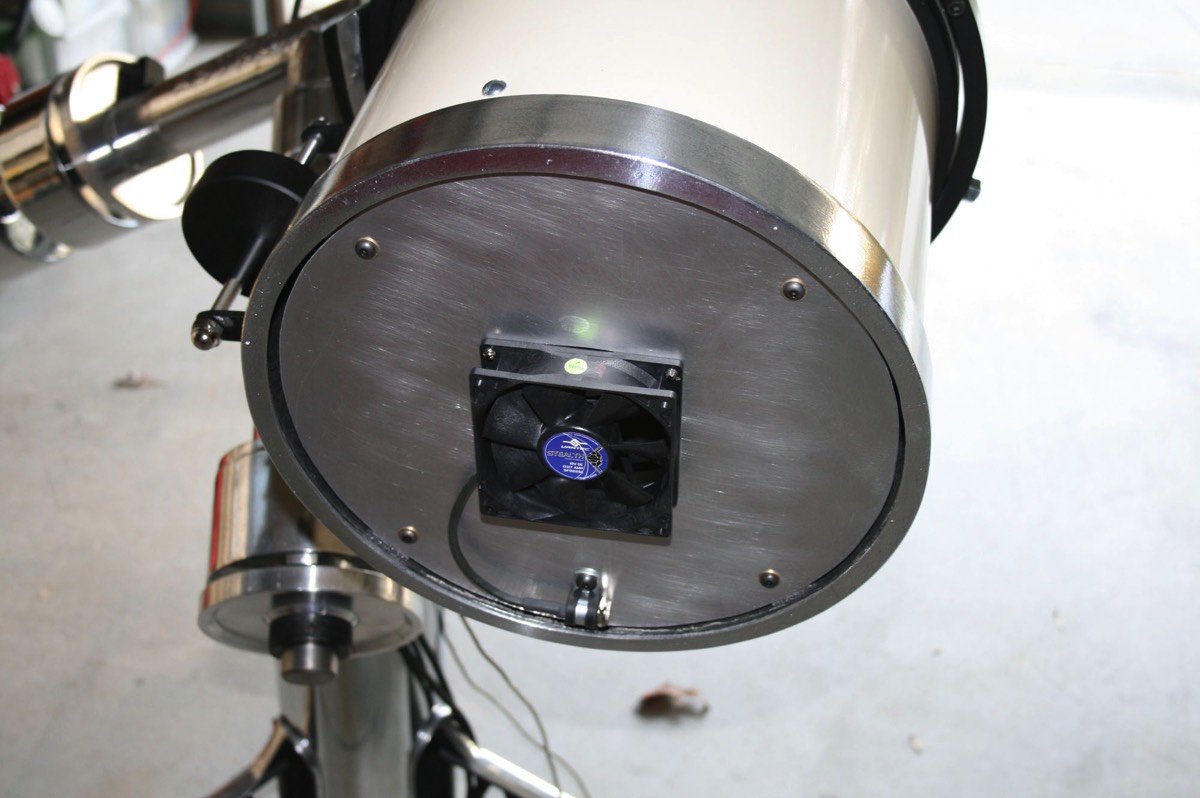
One other thing I worked on was a mirror/tube cooler. This would improve results not only when doing AP but visual as well. This is a little 90mm PC cooling fan mounted on an aluminum plate I fabricated. There are four tabs on the side which have foam material on them. I slotted the tabs to make them adjustable. Once I got them just right the whole thing has enough tension in the foam to hold it in the tube and I can just pull it out when I need to collimate.
I had a 1.5 amp 12V AC to DC wall wart power supply in my electrical widgets box and found a matching socket at Radio Shack that is held on the plate with a P clip.
The fan runs really smoothly and the foam eliminates any slight vibrations that might get into the tube.
I had a 1.5 amp 12V AC to DC wall wart power supply in my electrical widgets box and found a matching socket at Radio Shack that is held on the plate with a P clip.
The fan runs really smoothly and the foam eliminates any slight vibrations that might get into the tube.
I’ve recently upgraded to a color Point Grey Flea3 camera. This has the Sony ICX618 chip (the Philips uses the ICX098) which will allow higher frame rates without compression and should allow me to tease some better images out of our turbulent seeing. Hopefully I’ll be adding some images of Saturn soon.